Bill Long's Realistic Dragonfly Nymph


Return to Flies With a Story


A big nymph pattern from Bill Long of PA


Peter's note: Along with this dragonfly pattern, Bill has sent me a couple of other good patterns which I hope to add to fishingwithflies before too long.  (Sorry about the pun Bill.)

One of Bill's grasshoppers in on the hopper's page here.

If you have questions for Bill you can reach him by email here.

I fish a number of local ponds/small lakes that are situated in the middle of business campuses. There is no real reason to fish these ponds seriously as most have only small bass and sunfish, but they are close by and they are usually deserted. They all have good numbers of both dragonfly and damselflies, and I get a kick out of 
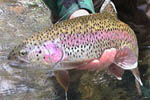
watching the small fish struggle to take a large nymph pattern.

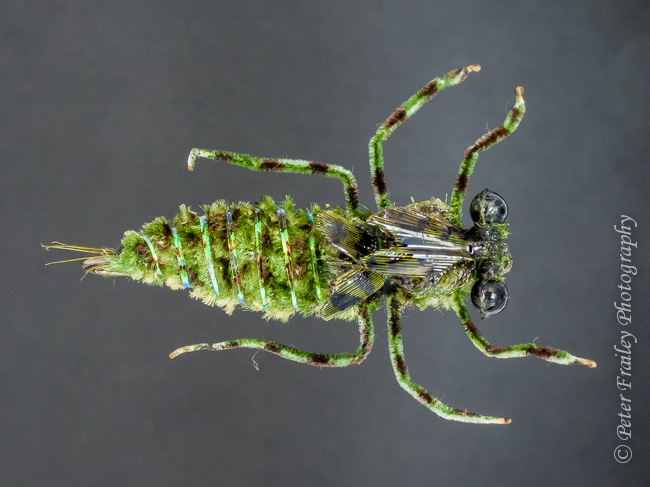
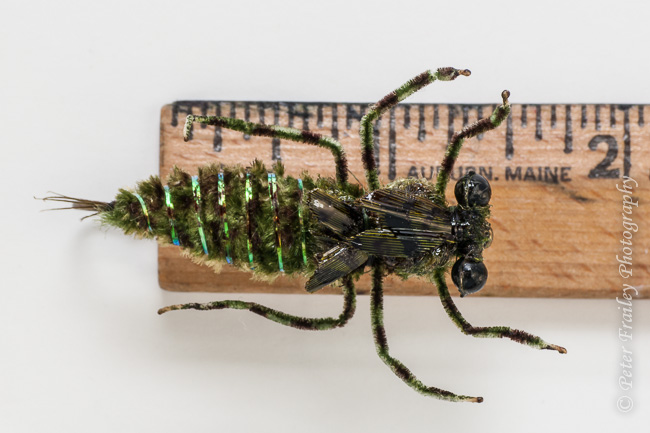
The ponds have several species of dragonflies and most are quite large, two species often run over 2 inches in length. One is a very dark olive (the pattern I am sharing here) and the other is much lighter. This pattern will work for both of them. The only changes necessary are color changes to lighter olive from dark and using less mottling. If you want to get ultra picky, the lighter colored nymph is broader across the abdomen. If I’m in the mood to play around, I’ll cut the under body a slightly different shape to exaggerate the differences.

I looked in Schweibert’s “Dressing Nymphs & Larvae” and see that the pattern used here is called Aeschna Constricta (Giant Dragonfly Nymph) and he also mentions a closely related species (Epiaeschna Heros, lighter colored).

There are lots of other species that range from pale olive to reddish brown and this tying method would be suitable for all of them. Subtly changing the underbody shape and reducing the hook sizes is all you need to do.

~Bill Long

Bill's Giant Dragonfly Nymph


Tying sequence:

HOOK: Mustad 9672 in sizes 2-4

THREAD: 6/0 Dark Olive

TAILS: Olive dyed pheasant tail fibers tied short

UNDERBODY:Cut to shape from a strip of clear plastic (finally a use for the heat sealed packaging that everything seems to come in these days and which only Hercules can open). Shape so that there is a prominent constriction between the long thorax and much shorter abdomen area

ABDOMEN: Chenille

RIB: Olive Flashabou

THORAX: Same as abdomen

WING CASES: Dyed Olive Pheasant tail mottled with a permanent marker

LEGS: X-small ultra chenille

EYES: Melted mono


Tying Tips and Techniques

  • Attach shaped underbody to hook shank at head and tail and then zap-a-gap to shank.

  • Attach several short tail fibers, flashabou, and chenille at the rear of the hook.

  • Wind chenille flat in a single layer over under body to slightly forward of body constriction.

  • Wind ribbing over chenille. You should keep the body wide but relatively flat.

  • Tie in first pair of legs (a 2-3 “ length of ultra chenille). Heat set the leg positions.

  • Tie in the first wing case feather. If you like more realism, you can first lacquer the feather fibers, and when dry, cut out a notch in the end. Mottle with a permanent marker.

  • Start wrapping the thorax making it heavier and thicker than the abdomen.

  • Continue wrapping the thorax a short distance and tie in the second pair of legs. Repeat thorax wrap and third pair of legs. Heat set the legs.

  • Attach the second wing case and mottle with permanent marker.

  • Tie in the mono eyes figure-8 style.

  • Wrap the chenille around the eyes to form a large head, and then whip finish at eye

Some final notes

I heavily lacquered the wing cases in the sample Peter photographed because I wanted them to stand up to USPS shipping . This isn’t necessary or recommended on the fishable pattern. A light coat of Sally’s [nail polish] will suffice to keep the wing cases from being chewed apart too quickly. Although the legs look stiff, they do actually move in the water when the fly is retrieved.

I know the fly is supposed to be fished deep and slowly. Most recommend keeping the fly close to the top of the weed beds, but I have much more success fishing it at mid-depth in short erratic strips/pulses.

You can further enhance the realism of the pattern by adding a small bit of dubbing to the legs where they tie in to the body. This gives a “thicker” look to the first leg segment. If you decide to add the dubbing, apply it sparsely to the tie in section and add a tiny bit of zap-a gap to hold it in place


 copyright © Notice by fishingwithflies.com. All rights reserved. This material is for your personal enjoyment. Please obtain prior written permission from the author and fishingwithflies.com before any other use.